twitter facebook instagram bloglovin tumblr google plus pinterest youtube
Showing posts with label cross stitch. Show all posts

Saturday, 4 May 2013

I'm a Guest Blogger on Make.Do.Sew!

Get Ready For Stitching - Here Comes A Wedding Project..

This week my Cross Stitch Wedding Ring Pouch  project was featured on Make.Do.Sew.  Little quick projects are my big thing at the moment and to get my Wedding ring pouch featured in time for all those Summer Weddings is a real pleasure.


I love reading Lou's blog as it is full of up to the minute crafty projects that inspire you to get your apron on or dig out your sewing box.  Grab a cuppa and take a look, I am sure you will be inspired.

So why not use up your sewing and stitching stash and great a personalise gift for the Bride & Groom? Click here for the tutorial Cross Stitch Wedding Ring Pouch

Happy Stitching,

Sam x
 

Monday, 29 April 2013

Making a Silk Dress For Baby..

Tips for stitching a beautiful silk dress...


I love stitching with silks, whenever I have a bit of a 'do' to stitch for I like to buy some posh material and make up a dress that really deserves to have the time and love stitched into it.

So many fabrics these days are poor quality, you can just feel the print and weave is hard and scratchy and not nice against your skin. So to work with silks that are beautiful, natural and drape wonderfully is such a joy. You pay a bit more but it is really worth it.

It is not all plain sailing as they can be a bit of a mare so here is are a few tips I have picked up along the way...

Make sure your sewing machine is set to the right tension for a silk. Adjust both your top and bottom tensions so that the fabric doesn't pull or when the seam is stretched the stitch doesn't show. This is called 'grin through' like the seam has big teeth grinning at you!


Use a test scrap first and sew your fabric with the thread you will use for the project. Make sure your stitch is right before you start to sew.

Use a light weight interfacing if your silk is light weight. You don't want the interfacing to pull!

Try stitching with a ball point needle and use a 80 max to stitch with.

If your fabric is super delicate stitch with tissue paper and then pull off the tissue at the end of the project. The seams will not pucker with the tissue.

Try and not unpick - silk is not that forgiving, if you have to try and steam over the unpicked stitched to make the fabric fall back to it's original weave.

I always wash silk by hand washing and then putting it in a plastic bag and putting it in the freezer! The water is frozen off and you just then shake off the ice when taking it out the freezer and hey presto no watermarks. Try it, it really does work.

Try and handle as lightly as possible, stitching and handling and cause your fabric to fray!

Baby Dress...

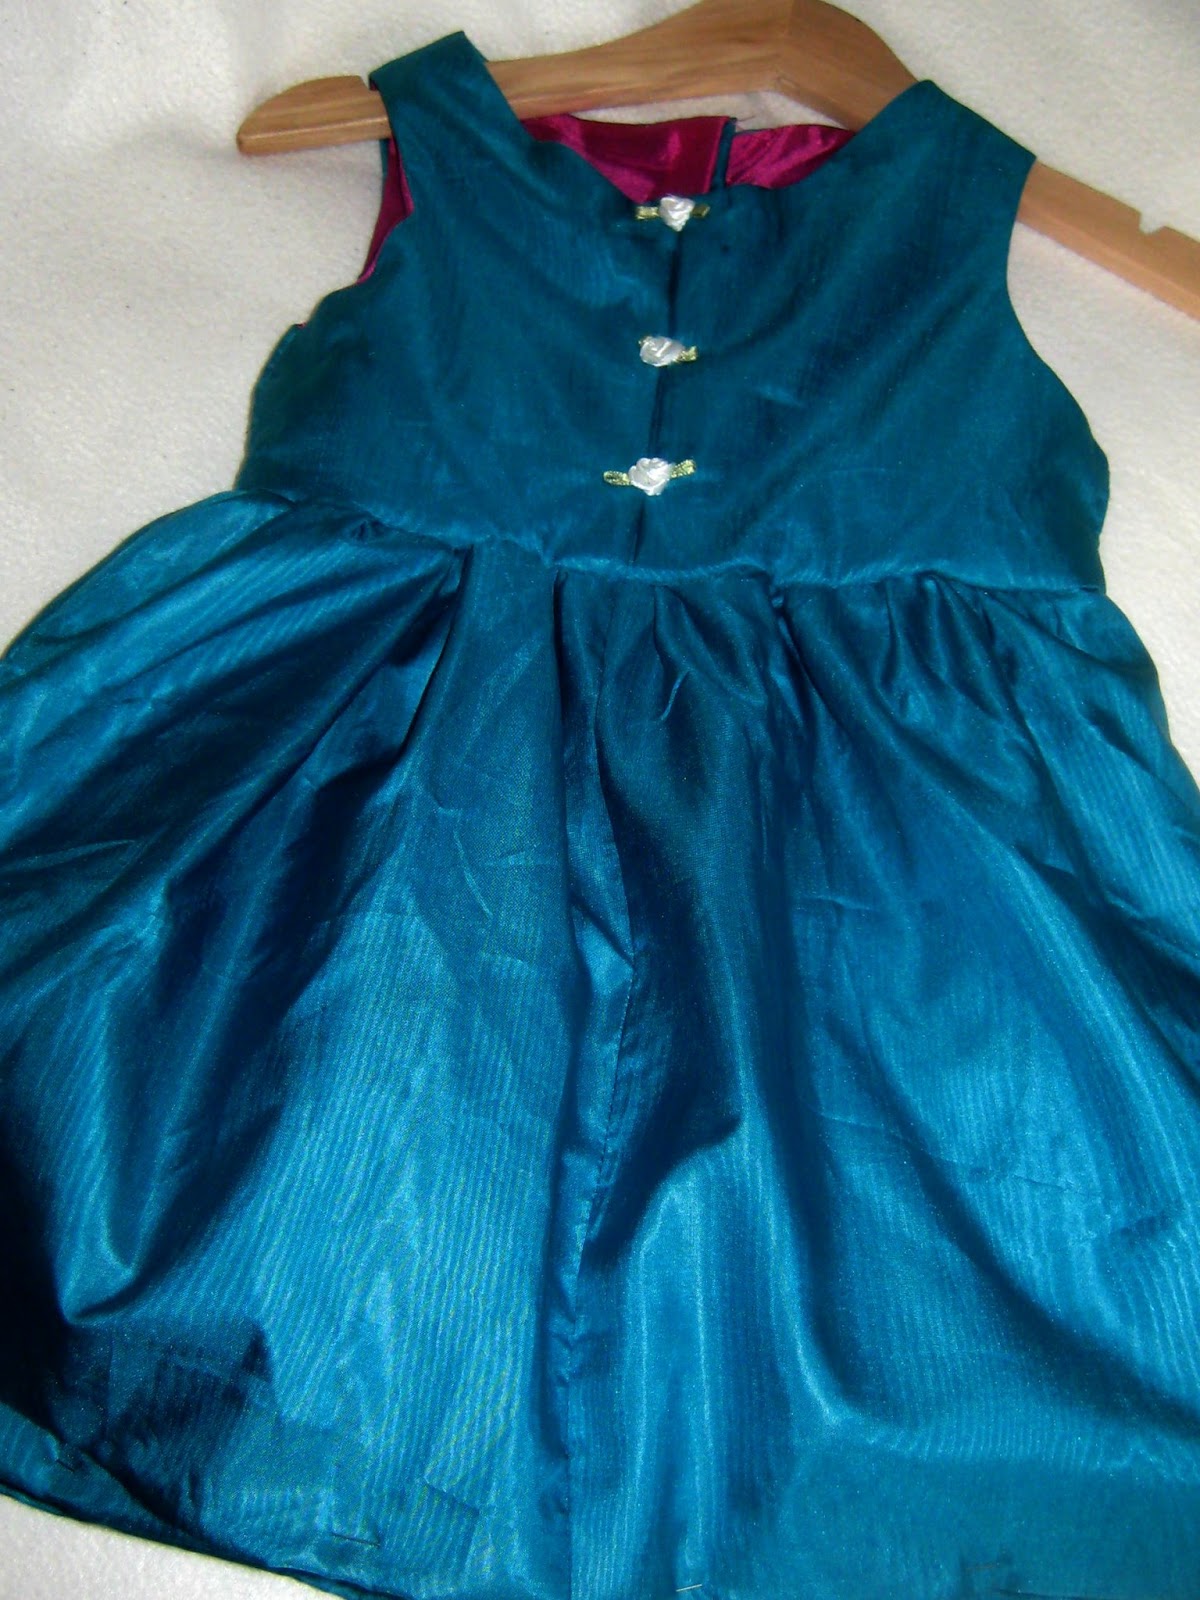
This dress for baby was made from silk taffeta with a gathered skirt on a lined bodice. The bodice was finished with a bias binding to trap in the oh so frayed silk to make it lye flat against the baby.

The skirt was given some fullness with self coloured net gathered to the under petticoat. An extra inverted pleat was added to the centre front to add decoration and also a bit more room if baby had a growth spurt in the two weeks I set to make it in!

I hope I have inspired you to try working with silk, I pay about £10 - £15 per metre for my fabric no more. 

Try it and let me know how you get on..

Happy Stitching, Sam x


Saturday, 27 April 2013

Simple Risotto Rosso

With Chilli, Roasted Peppers & Vermonth Rosso...

#recipeoftheweek (27th April)

 
 This is super easy, vegetarian and cooks in 20 minutes. I don't use the traditional method of stirring the rice until it gets lovely and fluffy in with the rest of the ingredients but use a separate pan to cook the rice and stir. This means it is finished in half the time of traditional cooking.
 
Risotto should always have the following - garlic, parsley, hard strong cheese, lemon and vermouth in my opinion! This version is a rosso version with a mid price vermouth rosso to add sweetness against the lemon and garlic. I roast the pepper the night before in the oven and leave to rest in the fridge in good quality olive oil. Let's Cook!
 
You Will Need -
 
3 cups risotto rice
1/2 garlic clove
1 red onion
1 red pepper (roasted before hand in the oven for 20 minutes)
1 tablespoon of lemon juice
1 teaspoon fresh chili
1 teaspoon parsley
1 tablespoon cream cheese (low fat!)
100 grams hard strong cheese
1 vegetable stock cube
1/4 pint boiling water
1 cup vermouth rosso
 
Oil to sauté in
 
Let's Create!
1. Bring to the boil the risotto rice in the water, parsley and stock cube. Simmer and stir in the vermouth. Stir so it's doesn't stick to the pan for about 15 minutes.
2. In a pan, sauté the onion, pepper, garlic and chili.
3. When the risotto rice has taken up all the stock and vermouth add the rice to the vegetable mixture.
3. Stir in the cream cheese, hard cheese and lemon juice.
 
Serve with breads, olives, green salad and a good white (Italian of course!)


Link up your recipe of the week

Wednesday, 24 April 2013

Candy Coloured DIY Baby Bib


Guest Blog Post With Cassie Jene

Check out my DIY Baby Bib project on Cassie Jene's fab website. I have had the honour of featuring this candy coloured cross stitch project.

It is perfect for a new baby project and simple enough for beginners.

And what a beautiful little model for the project too (I am biased)!

Happy Stitching...


Tuesday, 12 March 2013

Happy Easter Cross Stitch Tag Project

Happy Easter 2013 Gift Tag

 
We all like adding a little extra to a gift, so for this Easter, cross stitch a little tag. Perfect if you are a beginner or want a super quick project.


Cross stitching gives a heirloom quality to your work, a technique that is past down through the generation and one of my many lady-like crafts I love to blog about!

You will need just the basics, some 14 count aida fabric, the four colours of threads, a cross stitch needle and scissors and a small hoop (optional). All available from your local haberdashery store.

Make sure that your stitches all go in the same direction and you will your design grown before your eyes!

Once you have stitched all your full stitches, you can then use 1 strand of thread and use a back stitch stitch and draw in the flower petals.

For more info click on the link

Click on the link below to get your free gift tag pattern
http://www.facebook.com/samanthaschofielddesigns

Let me know what else you would like charting?
blogger template