twitter facebook instagram bloglovin tumblr google plus pinterest youtube
Showing posts with label Recipes. Show all posts

Saturday, 6 September 2014

Jam Making in 30 mins

Homemade Jam

                                    jam making


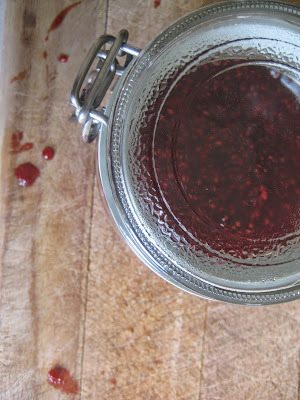
I've had a glut of raspberries this Summer and decided to make jam as I was told it's simple and really rewarding. I've never ventured into jams and chutney's ..until now! (*drum roll*) but after being told by my most trust worthy sources (my family) that it was easy, I wanted to have a go. Previous nightmare stories I had heard included un-cooked jam, burnt jam and messy jam filled kitchen nightmares! I felt brave and here's my story with not a sniff of burnt jam insight!

Firstly I bought some Kilner jars with the click open lids instead of having to use paper, greaseproof and string as on conventional jam jars. You can buy a great range also from Ikea as well, this meant I wasn't spending my jams hunting for spare jam jars and filling the cupboards with them.

To get started, you need to sterilise the jars, simply wash them in warm soapy paper and then put them in the oven at 140C or similar. Roll them in on their sides in the middle of the oven ideally and leave for ten mins.


I followed this recipe as it was so simple and used a super jam thermometer from Kitchen Aid. Highly recommended.  A great tip is to freeze a few plates to check the jam sets! I froze three plates for my first batch and tested a teaspoon of jam on each plates to triple check.


A day later, we tested the jam  in sponge cake and on toast (just to double check, of course) and it was lovely.

So I'm really please to announce...we now have Derbyshire raspberry jam!

If you have any more tips for jam making would love to hear?

Bye for now,

Samantha x

Sunday, 22 December 2013

Handmade Bath Bombes

Last year I made these... 

Bath Bombes, I gave them as presents last Christmas and my friends loved them. I was really touched! I wrapped them in little acetate bags and tied the tops with raffia.
They started with these...
Here are a few pictures from the post...
bath bombe hearts

Devonshire lavender I picked on holiday


 I was so flattered when Canny Crafty made these...
                               
They are gorgeous little mince pie bath bombes. How pretty?

I would love to make more bath bombes, if you have a recipe please share...

Happy Crafting,


Wednesday, 18 December 2013

Chocolate & Orange Christmas Cookies

I wanted to share this recipe I created last night but first here's a photo as I'm busy wrapping and stitching...

Back again, I created these after seeing all the amazing cookies made for National Cookie Day in the US a few week ago. I was inspired by a Nigella recipe but wanted to use white chocolate and lots of Christmas flavours. These have a real Christmassy taste to them with orange essence and a little cinnamon.

Here's the recipe...

125 grams white chocolate
150 grams flour
30 grams cocoa
1 teaspoon of bicarbonate of soda
125 grams butter
1 pinch of salt
50 grams caster sugar
80 grams of brown sugar
1 teaspoon o orange essence
1 pinch of cinnamon

Makes 12

Heat the oven to 175C 
1. Melt the chocolate in a pan on a low heat.
2. Cream the butter and sugars together. Add the orange essence.
3. Add the melted chocolate.
4. Mix the flour, bicarbonate of soda and salt together and sieve in.
5. Mix the mixture and then spoon in dessert spoon size chunks onto a greaseproof lined tray.
6. Bake for 20 minutes and leave to cool on a rack.

They are great warmed with ice cream ...mmmm!

Happy baking! Share your Christmas bakes at #createitsamantha.

Friday, 5 July 2013

Slow Down Food Moroccan Style


My latest project - slow down food...


What is Slow Down Food?

We are living in a fast, quick, on the go world and bringing up a family in a modern world sometimes means that we need to slow down. Slowing down in our eating means we eat well, good home cooked food and take time to enjoy it and the company we are in.

I recently attended a workshop where Amelia Horne from Jack Rabbits Kitchen Derby was a key speaker. Her business is based on bring good quality home cooked food into a restaurant environment. Cooking food slowly and eating in a WiFi free space.

I also saw an interview with business woman Kareen Bradey who gets up at 6 a.m and puts a casserole in her slow cooker for the family. If Kareen can cook well with her schedule, I have no excuses!

There is a slow move back to eating well and enjoying our food around the table. We had a gorgeous set of  Le Creuset for our Wedding, it does weigh a tonne and I store it in low cupboards but it does a great job of cooking casseroles, tagines and stews slowly and is easy to clean.

We had the classic orange but new colours come out each season and add a contemporary twist on a classic. I have to admit now I have a family and time in the kitchen is precious, I would be lost without my Le Creuset. The lid fits on perfectly so no twisting to fit in a little groove whilst your child has there hands in the oven! You can lift the lid, check if it needs a stir and pop the dish back in the oven quickly before your little one has time to run into the kitchen. Easy and safe!

So for our slow down food Moroccan style, I made this simple tagine to serve with plain couscous, peas and a dash of lemon.

You Will Need  -
1 red onion
1 aubergine
1 red pepper
1 yellow pepper
1 box of passata or a tin of tomatoes
1 tin of chick peas
1 teaspoon of cinnamon
Handful of mint leaves from the garden or from a supermarket plant

Let's Create -

This is the easy part, chop up all your vegetables. Saute to seal in the flavour on the hob for a few minutes. Add the drained tin of chick peas and the box of tomatoes. Stir in the spice and mint.
Pop it in the oven at 150C for about 2 hours or lower for longer if you are out.
Your vegetables will be soft and your tagine will be seasoned with so many flavours you will wonder why you have rushed before.

There is a time, once a week when this or a similar recipe makes me bring out the Le Crueset and cook slow.

Love to know what you cook slow...

SS x
 

Sunday, 26 May 2013

Ratatouille


I remember back in the 80's when courgettes became available and Mum would cook this for us as a young family. So when my Mother-In-Law gave me a cook book that she had helped to put together and this recipe was in it, I had to make it as it brings back so many memories.

It is a simple dish to make with a rich tomato sauce. Chop up the vegetables and saute in the oil until soft, add basil, teaspoon of sugar and splash of balsamic vinegar. Reduce the heat and simmer for thirty minutes. Serve with fresh bread, lovely oils and lots of conversation.

Happy Cooking,

SS xx

Saturday, 4 May 2013

Roasted Squash & Sage Soup

#Recipeoftheweek 4th -11th May

 
This soup is rich with a touch of sweetness from the roasted squash and the sage gives it a wonderful depth of flavour. A good combo for a Saturday lunch.
 
You Will Need -
 
Half Roasted Squash (I roasted mine on Friday night and stored in the fridge)
1 medium size sweet potato
1 red onion
1 large carrot
10 fresh sage leaves
1 vegetable stock cube
Half pint boiling water
 
Walnut oil to sauté with (I prefer it as it gives a nutty taste)
 
Let's Cook!
 
1. Saute the onion then when soft at the rest of the vegetables.
2. Make the stock up and pour over the vegetables.
3. Cook for 20 minutes until the vegetables are soft.
4. Liquidise the soup and add the sage leaves right at the end and blitz for one last time.
 
Great served with crusty breads 


Love to share other great soup recipes, let me know some great recipes to try?

Link up your recipe of the week


Happy Cooking,

Sam x
 

Monday, 29 April 2013

Making a Silk Dress For Baby..

Tips for stitching a beautiful silk dress...


I love stitching with silks, whenever I have a bit of a 'do' to stitch for I like to buy some posh material and make up a dress that really deserves to have the time and love stitched into it.

So many fabrics these days are poor quality, you can just feel the print and weave is hard and scratchy and not nice against your skin. So to work with silks that are beautiful, natural and drape wonderfully is such a joy. You pay a bit more but it is really worth it.

It is not all plain sailing as they can be a bit of a mare so here is are a few tips I have picked up along the way...

Make sure your sewing machine is set to the right tension for a silk. Adjust both your top and bottom tensions so that the fabric doesn't pull or when the seam is stretched the stitch doesn't show. This is called 'grin through' like the seam has big teeth grinning at you!


Use a test scrap first and sew your fabric with the thread you will use for the project. Make sure your stitch is right before you start to sew.

Use a light weight interfacing if your silk is light weight. You don't want the interfacing to pull!

Try stitching with a ball point needle and use a 80 max to stitch with.

If your fabric is super delicate stitch with tissue paper and then pull off the tissue at the end of the project. The seams will not pucker with the tissue.

Try and not unpick - silk is not that forgiving, if you have to try and steam over the unpicked stitched to make the fabric fall back to it's original weave.

I always wash silk by hand washing and then putting it in a plastic bag and putting it in the freezer! The water is frozen off and you just then shake off the ice when taking it out the freezer and hey presto no watermarks. Try it, it really does work.

Try and handle as lightly as possible, stitching and handling and cause your fabric to fray!

Baby Dress...

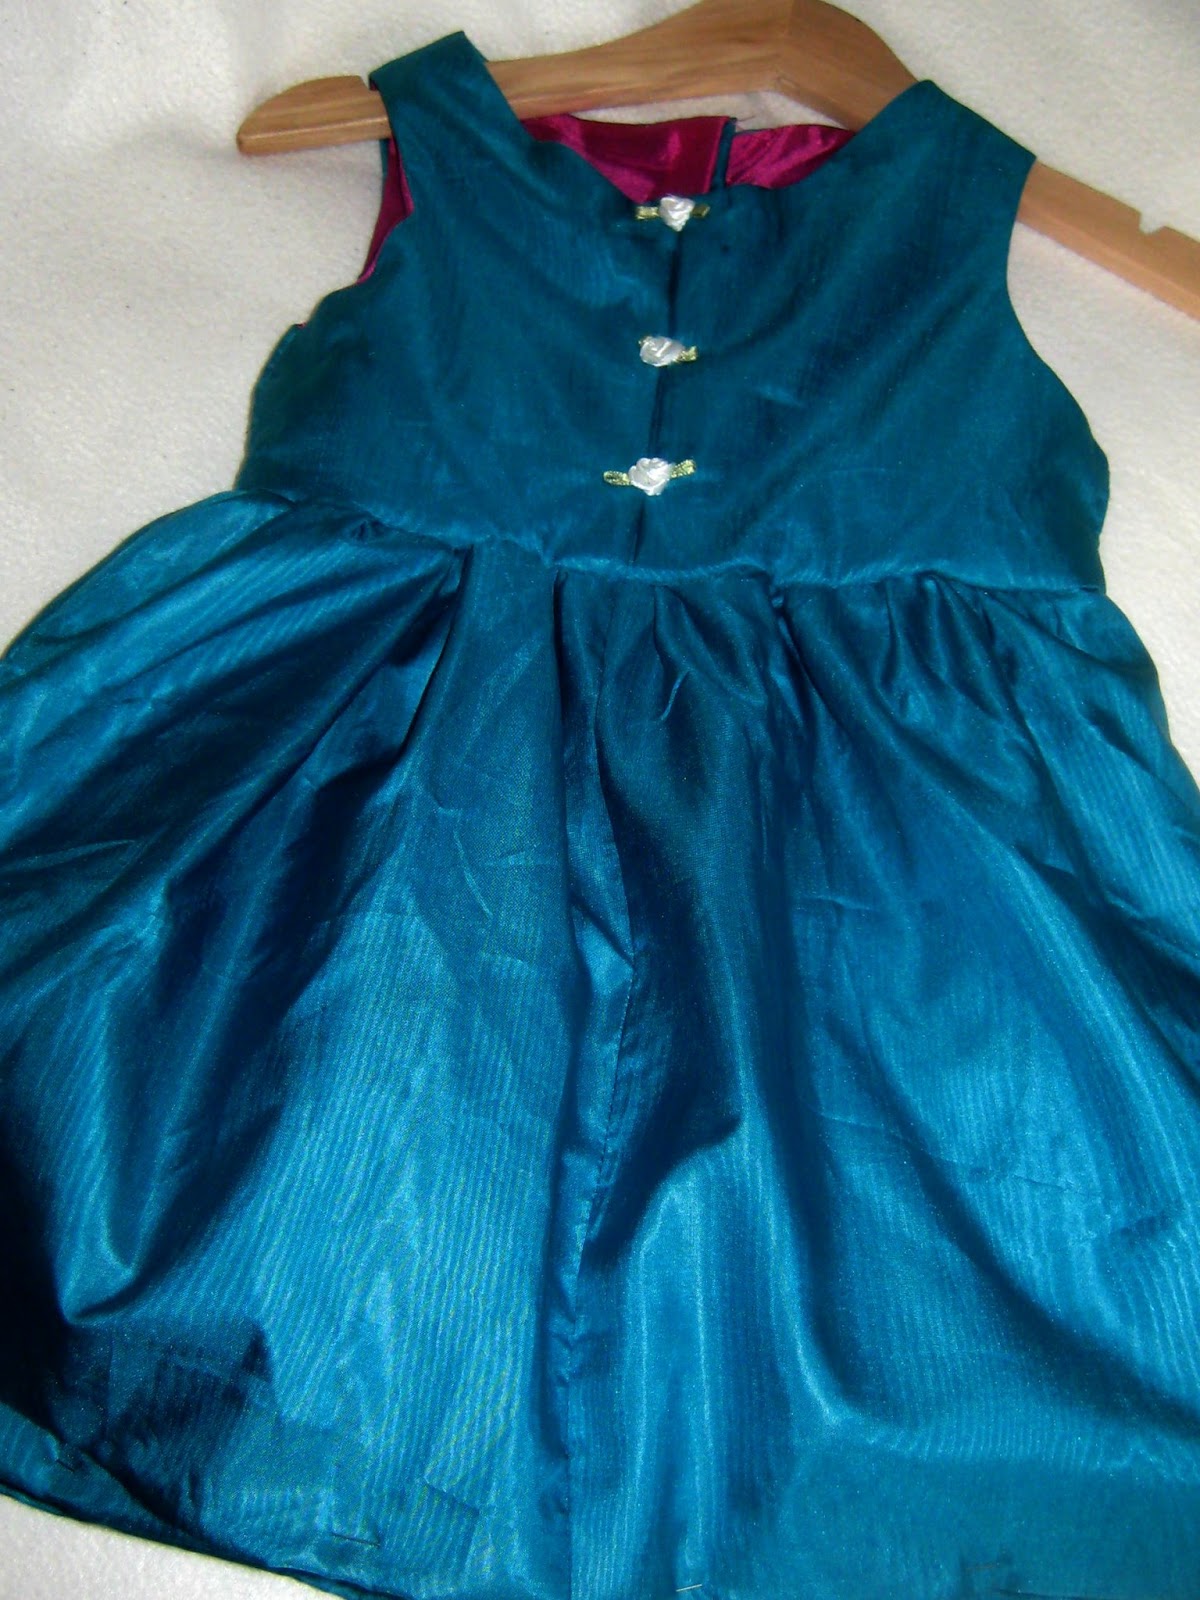
This dress for baby was made from silk taffeta with a gathered skirt on a lined bodice. The bodice was finished with a bias binding to trap in the oh so frayed silk to make it lye flat against the baby.

The skirt was given some fullness with self coloured net gathered to the under petticoat. An extra inverted pleat was added to the centre front to add decoration and also a bit more room if baby had a growth spurt in the two weeks I set to make it in!

I hope I have inspired you to try working with silk, I pay about £10 - £15 per metre for my fabric no more. 

Try it and let me know how you get on..

Happy Stitching, Sam x


Saturday, 27 April 2013

Simple Risotto Rosso

With Chilli, Roasted Peppers & Vermonth Rosso...

#recipeoftheweek (27th April)

 
 This is super easy, vegetarian and cooks in 20 minutes. I don't use the traditional method of stirring the rice until it gets lovely and fluffy in with the rest of the ingredients but use a separate pan to cook the rice and stir. This means it is finished in half the time of traditional cooking.
 
Risotto should always have the following - garlic, parsley, hard strong cheese, lemon and vermouth in my opinion! This version is a rosso version with a mid price vermouth rosso to add sweetness against the lemon and garlic. I roast the pepper the night before in the oven and leave to rest in the fridge in good quality olive oil. Let's Cook!
 
You Will Need -
 
3 cups risotto rice
1/2 garlic clove
1 red onion
1 red pepper (roasted before hand in the oven for 20 minutes)
1 tablespoon of lemon juice
1 teaspoon fresh chili
1 teaspoon parsley
1 tablespoon cream cheese (low fat!)
100 grams hard strong cheese
1 vegetable stock cube
1/4 pint boiling water
1 cup vermouth rosso
 
Oil to sauté in
 
Let's Create!
1. Bring to the boil the risotto rice in the water, parsley and stock cube. Simmer and stir in the vermouth. Stir so it's doesn't stick to the pan for about 15 minutes.
2. In a pan, sauté the onion, pepper, garlic and chili.
3. When the risotto rice has taken up all the stock and vermouth add the rice to the vegetable mixture.
3. Stir in the cream cheese, hard cheese and lemon juice.
 
Serve with breads, olives, green salad and a good white (Italian of course!)


Link up your recipe of the week

Saturday, 6 April 2013

Rum,Chocolate & Raisin Slice


I love rum and raisin ice cream, it reminds me of warm sunny days and the seaside. So with this thought, I created a chocolate rich cake. Make it thin in a 8" tin, it will make two tins worth. Store it up to 1 week in an airtight tin. Serves (both tins ) 10.  Great slightly warmed with ice cream.

Let's Create!

2 eggs
100 grams self raising flour
25 grams good quality cocoa
100 grams unsalted butter
1 tablespoon milk
1 cup raisins
1 teaspoon rum essence
Icing sugar to finish

Preheat the oven to 180C or equivalent.

1. Cream together the butter and sugar to the mixture forms soft pale cream peaks.
2. Add the essence and each egg one by one and beat well.
3. Sift in the flour and cocoa, then fold in.
4. Add the raisins and fold again.
5. Grease both 8" tins and add in the mixture.

Bake for 20 minutes or until the cake is springy to the touch.

Leave to cool before turning out on wire racks.

I really love this recipe with a good quality coffee. A real treat.

If you liked this recipe then search my blog for more recipes and baking posts under the title header.

Happy Baking!

Sam x

Tuesday, 26 March 2013

My Italian Almond & Chocolate Cakes

Perfect with a strong coffee and light enough to have more than one..!


I have not have much time to blog in the last week due to work, illness and a teething daughter. But tonight, I thought, it's time to go in the kitchen and create a new recipe.


It's been a while, so with a need for a good strong coffee I bring you my Italian inspired almond and chocolate cakes. And they really are perfect with a good proper coffee made with beans and hot milk. The cakes use rice flour to give a bit of bite which is unexpected but makes the texture not as light and fluffy as a fairy cake.
So, if you like me only have the kitchen for 30 minutes, cook up some delights and put your feet up!
To make 12 cakes you will need -
125 grams unsalted butter
125 grams sugar
2 free range medium sized eggs (mine weighted 125 grams for those who read my post on weighing your eggs!)
75 grams self raising flour
50 grams rice flour
1 teaspoon baking powder
1/2 teaspoon almond essence
2 tablespoons good quality cocoa
1 tablespoon milk
12 cake cases and a cake baking tray

Let's Create!

1. Set the oven to 180C or similar check your manual.
2. Cream the butter and sugar together until light and fluffy.
3. Beat in the eggs one by one.
4. Add the almond essence.
5. Sift the baking powder and flour into the mixture then fold in the rice flour too.Fold in big movements to give lots of air to the mixture.
6. Fold in the cocoa and stir in the milk.
7. Add a heaped tablespoon to each cake case.
8. Bake until soft and bouncy on the top and a knife is clean when tested on the cake.
9. Cool on a wire rack before serving.

Saturday, 16 March 2013

Little Fairy Cakes - My Foolproof Recipe

My Little Fairy Cake Secret ....

Mmm fresh and from the oven...

I just love to make little fairy cakes, but sometimes when you are busy they are not as easy to do. The edges go biscuit like and the sometimes they are too dry or too greasy. A local farmers wife told me this trick and it works every time for me.

Weigh out your eggs first. The eggs all weigh different especially if they are free range. Then whatever the weight of the eggs, add equal amounts of butter too cream with the equal amounts of sugar. Beat the eggs and fold in equal amounts of self raising flour. Add a dash of cream and vanilla essence at the end. Pop into cakes and bake at 175C or similar for 20 mins.

A secret worth sharing.

Can you share any tips? Happy baking ..


Sunday, 10 February 2013

Hazelnut Pesto, a twist on a classic recipe

Thrifty pesto - so gorgeous I am adding an extra post!


Hazelnut Pesto, a twist on a classic recipe

Thifty Pesto is a fab addional to the fridge as you can add it to most things! I spread it on toasted breads, add it stews as well as stir through pasta (which most supermarket versions recommend). Make it really thick and you can always add some oil to make it runnier to stir through pastas.

The variety I made and is now sitting in our fridge is a green pesto with toasted hazlenuts. The recipe is easy -
Ingredients -
2 white onion's
1 bunch basil (handful size)
1/2 clove of garlic
tablespoon of lemon juice
2 teaspoons of dried basil (dried herbs are good, a different taste from the fresh versions)
100g mature cheese (has to be strong)
2 tablespoons of olive oil
75grams of toasted hazlenuts
nut oil to saute
salt and pepper to taste

To make is easy -
Chop the onions up into small cubes and saute in the nut oil with the dried basil. Turn off the heat. Add the lemon juice and stir and leave to cool.
Add the peeled garlic, basil leaves, cheese and olive oil to mixing bowl.
Take the onions and add to the other ingredients.
With a hand blender and a tea towel to cover the top of the bowl, blend until mixture looks smooth but will still some texture.

Season to taste and enjoy...

Saturday, 2 February 2013

Banana & Cherry Loaf Cake

Slice It Up, Pack It Up; Not Too Sweet For Little Ones..


Pictures and recipes coming later...

My banana and cherry loaf cake has gone down a storm this week. I needed to start to make not too sweet and gooey cakes now that Lamorna is 15 months and loves her cake.

When  I was feeding and she wasn't eating big calorific cakes were needed to get us through the day. So I baked sponges filled with jam and butter cream as you will see on my earlier posts.

Now, making a loaf cake which the whole family can have in pack ups or as a snack is better than a bought biscuits and better for us too. Plus whilst I had a savoury bake in the oven or some jacket potatoes I can cook both at the same time. Keeps fresh and wrapped up for about 10 days, if it lasts that long. My daughter just loves this and Daddy takes a slice to work. You can freeze for a month but I recommend wrapping it up and eating fresh, it is so easy to make will only take about ten minutes to do.


Sunday, 27 January 2013

The Icing on the cake..

I know it is January; diets, cutting back etc..

 but I wanted to start looking at the icing on the cake - literally!


I was icing a cake yesterday in a rush and decided to just pile on the butter cream into some 'Mr Whippy -eque' peaks of loveliness. I decorated these with white chocolate stars and was amazed that sometimes you don't need to be perfect and proud of your delicate iced creations.

My Mum also told me a story how on Friday in the supermarket a lady about my age stopped her and asked 'how do you make butter cream?' She then asked if it is  'butter and cream' which she had in her basket. She was decorating her son's birthday cake.

My Mum told her as she taught me, butter cream is butter whipped with icing sugar until the icing is white and forms soft peaks. The lady was so grateful to my Mother and my Mother was equally happy that her daughter was taught to goodness of icing! Thanks Mum for the lessons.

So as I was forming peaks of icing, I thought how I had iced in past using basic and easy icings.

The icing I used this weekend was a basic buttercream with cocoa folded in to give a speckled apperance/


The Humming Bird bakery has a lot to answer for as when baby was little, it was so easy to get a palette knife and smooth the icing over a sponge cake and decorate. The washing up was minimal and no bags or pipers to wash! I still use this technique of a little curl on top of my cakes and decorate with stars or cherries.

 To make the butter cream smoother I add glycerine and an essence which was it smooth and fluid and the extra liquid in the essence makes the spreading of the cream easier.

Do you have an icing which you love? Tell me the recipe! Happy icing...

Hand Created Occasion Cards

Get Your Stencils And Free Hand Techniques ...

And Create Your Personalised Message On An Occasion Card


 Sometimes you cannot find the card with the message on it, you might want to say something personal or simple and cut to the chase..'I love you' or 'you are great, you deserve the promotion!'I wanted to congratulate a friend on the great news that baby number two was on the way. The thing is that you don't get cards with that on..

So, I got out my paints and painted what I wanted to say on two pieces of paper I stitched together on my sewing machine. When I had painted my words, I highlighted these with gold paint and soft "B grade pencil.


I took a colour that I loved and would stand out easily such as red. To get you started use a colour such as blue, green or red as it will look good on cream paper. Yellows and pastels will not have the same impact due to the colours being softer.

My friend texted me today to say that she loved it. Why not have a go and let me know how you got on?

Tuesday, 22 January 2013

Low Fat Meat Free Bolognese

For A Lower Fat And Very Rich Bol..Try The Veggie Option!

 I love, love, love spag bol and being vegetarian doesn't stop me cooking this for the family. Plus as it is so rich and low fat you can treat yourself to a glass of red with it?

You Will Need -

1 red onion
4/5 medium sized mushrooms
1 tin cannellini beans
100 grams Textured soya protein or Quorn mince
1 small box of passata or a tin of sieved tomatoes
1 teaspoon of dried basil
1 teaspoon of sugar
1 vegetable stock cube
1 teaspoon of Balsamic Vinegar
1 tablespoon of walnut oil for cooking

Serve with your favourite pasta cooked al dente!

Let's Create...


1.If you are using TSP, add this to boiling water and heat for 5 minutes so that it is soft and fluffy. If using Quorn mince you don't need to do this.
2. Saute the red onion and mushrooms in a pan with the herbs.
3. Add the drained beans and TSP or mince and brown.
4. Add the passata, sugar and stock cube. Bring to the boil then quickly reduce and simmer for 20 minutes.
5. Add the balsamic vinegar just before serving.

 Grate a few shavings of hard cheese over your sauce and let it melt in. Enjoy!


Thursday, 17 January 2013

January Diets - No Chocolate Cake! Well just one..

This Chocolate and Apricot Cake is the only cake you need this month... 

... put the diet on hold this weekend and enjoy!


 How on earth can we be good in these cold days, I am cold and need some comfort food every now and again. It is hard work with a young baby all day, lifting and running about and then to live on a salad - no way! Yes, we are a healthy family and I am not saying go crazy but you deserve a little treat to both make and enjoy cake. A simple pleasure and an delight to make!


You will need the following -

125 grams caster sugar
2 eggs
125 grams butter
100 grams self raising flour
1/2 teaspoon baking powder
125 grams cocoa
2 tablespoons of milk or if you fancy stir in your tipple of choice
 
2 tablespoons of apricot jam
 
Dusting of icing sugar to serve


Let's cook!


1. Cream together the butter and sugar until they are light and fluffy.
2. Beat in the eggs one by one.
3. Sift the flour, baking powder and cocoa into the mixture and fold.
4. Add the milk or tipple of choice and fold.
5. Grease two eight inches cake tins and add the mixture.
6. Bake in a 175C oven or equivalent for 30 mins or until a knife is clean on testing.
7. Leave to cool and then sandwich together with hot apricot jam.
 
8. Dust with icing sugar.


Friday, 4 January 2013

With The Baileys Now Open For Christmas ...

With The Baileys Now Open For Christmas ...

...make this cake with store cupboard essentials

I just love this cake as it has all those lovely things that you need after a busy day. So rich but light and easy to pop in the oven if you have the oven on for dinner.
You will need the following -
125 grams caster sugar
2 eggs
125 grams butter
100 grams self raising flour
1/2 teaspoon baking powder
30 grams cocoa
2 tablespoons of Baileys
Let's cook!
1. Cream together the butter and sugar until they are light and fluffy.
2. Beat in the eggs one by one.
3. Sift the flour, baking powder and cocoa into the mixture and fold.
4. Add the Baileys cream and fold.
5. Grease two eight inches cake tins and add the mixture.
6. Bake in a 175C oven or equivalent for 30 mins or until a knife is clean on testing.
Leave to cool and either serve as it is or with fresh cream.
Lovely change to spiced and fruity cake at this time of year.

Saturday, 29 December 2012

Oh Thirfty Tarts!

After Christmas Use Up Everything (well nearly) in ..


A Tempting Tart!

 
After all those Christmas treats, gorgeous cheese boards, Italian delights (pestos, olives etc) it is time to be a bit Thrifty and clear out those fridges and have some puff pastry tarts. Buy a block of puff pastry from the local supermarket (cost £1) and roll out. I made 5 tray tarts, roll it as thinly as possible as it rises and you want the crisp base with a doughy middle.
 
I made a lovely mozzarella, tomato and pesto tart which cleared up some of the Christmas day goodies plus a squash and apple wood cheese tart to name just a few.
 
We comfortingly had our with peas, jackets and lashings of gravy. Just the thing for a cosy night low cost night in between Christmas and New Year.. Enjoy!


Thursday, 27 December 2012

Post Boxing Day Curry

When the relatives have gone home and you still have a fridge full of bowls and old veggies... 

..make a curry!


For me, Christmas was very special as I made my first Christmas day lunch, but with seven people for dinner the thought of running out horrified me. I didn't go crazy but made sure we had enough plus a bit more.
 
So this afternoon, I set about making a glut of curry bases to chill or freeze with what I had left. The spices in the cabbage and the sweetness in the onions was perfect. I started by sweating an onion , then adding the red spiced cabbage, red onions, parsnips and carrots. Reducing the heat, I covered the vegetables with boiling water and added a stock cube. after half an hour when the veggies were soft I blended the mixture. Then filled three boxes with the mixture to make curries in future weeks.
 
For tonight's dinner, I took four large spoons of the mixture and left it on one side whilst I sweated a white onion, added a yellow pepper, a roasted sweet potato and some mushrooms. To the pan I addded ground ginger and garlic powder and the curry base mixture. Cooking low for about ten minutues the spices infused the freshly cooked vegetables until the curry looked rich.
 

The rest will be chilled and frozen and I now have an empty (ier) fridge. A bargain dinner for post boxing day.
blogger template