twitter facebook instagram bloglovin tumblr google plus pinterest youtube
Showing posts with label Baking. Show all posts

Friday, 12 February 2016

DIY Chocolate Calligraphy

Writing in Melted Chocolate For Valentine's Treats
 
 
I'm stopping by today to share my new discovery of homemade chocolate calligraphy just in time for V-day. I've also put a tutorial on the post for a supermarket version. I was over the moon when I tried this for the first time with a bar of milk chocolate and it worked.
 
So here's how to create your own shapes or writing in chocolate at home for that extra finishing touch...
 
To start with you will need ...
some greaseproof paper, a tea towel, a piping bag, teaspoon, a tray for the greaseproof to sit in and a pyrex jug that holds a few pints (enough to soak the tube or icing bag in)
 
 
You can buy Cake Décor from Lakeland for under £2. You simply place the tube in boiling water for a few minutes, I massaged the tube so it's soft then place it back in the water.
 
 
Once the tube is melted through, snip off the end and then you can start writing. It is thicker than melted chocolate so you can spend more time on what you are writing.
 
 
The easy homemade version which works, but the chocolate is thinner so you need to be quicker. You just need a bar of milk chocolate and a disposable icing bag (and some scissors to snip the end)
 
 
Break up the chocolate and put it in the icing bag in a the pyrex jug (don't microwave it). When it's melted through, snip the end of the bag just a little to reduce the flow.
 
 
After about five minutes of chocolate calligraphy I chilled my writing for twenty minutes and then when hard put the writing and hearts on foil.
 
So we tasted each and the milk chocolate was much better! So this is what we made with the chocolate hearts...
 
Easy Chocolate Heart Cakes
 
 
I baked a tray bake sponge and let it cool. Then with a heart cutter on an iced board I cut out the two hearts.
 
 
We stuck both hearts together with raspberry jam.
 
 
Dusted the top with icing sugar.
 
 
Added a spoonful of fresh cream and added on top the milk heart.
 
Perfect and handmade for Valentines!
 
I hope you enjoy this tutorial as much I did making it...
 
 
Samantha xoxo

Sunday, 6 April 2014

Let's Try...Handmade Chocolate Buttons


I loved the idea of making your own little chocolate shapes from moulds and when they are buttons ... well I am in heaven. How cute?

Baked By Me is a Nottingham based company owned by the lovely Iris. Like me, Iris loves baking and set up the company specialising in unique moulds a few years ago. So last week, Little L and I road tested the moulds to see if we could really get white chocolate 'button' buttons? If I could make these with a two year old's assistance I would be so happy.

We started off by using a good quality white chocolate which we melted on a low heat in the microwave for a few minutes. Then using a palette knife we poured in the chocolate and smoothed over the top to leave a clean finish. Pictures are WIP (work in progress). You don't have to work that fast as the chocolate stays liquid-y for quiet a while.

Once we were happy with the moulds we popped them in the fridge for a few hours. THEN.. the exciting bit! We snapped them out the mould and.... hooray they worked. So utterly simple and the finish was a pro finish - all glossy and smooooth.

We also used the letter mould to finish our decoration. Melted chocolate was poured into a bakers pipette (as the mould is smaller you need to get in the corners) and then smoothed over, popped in the fridge and hey snap, snap the letter just popped out.

It's so easy...it's child's play.

Great for Easter I'm thinking, I've seen some very lovely Easter bunny moulds...hmmm.

BBTN,

Thursday, 27 February 2014

Our Half Term

Last week's half term in pictures...
 
 Pinnies, wellies and our kitchen!


Glad to say the bugs have now gone and we are so ready for March!

Samantha x

Thursday, 10 October 2013

My Most Seen Cake Recipe -Foolproof Fairycakes

I wanted to share this post on the go from my phone as I seem to be having major updates on my laptop.

I am to and fro at the mo getting everything ready for my first Food & Craft Fair this weekend! So excited.

So if you are thinking of a simple baking recipe that is totally foolproof - try this...it keeps bring shared and shared

Foolproof fairy cakes recipe - http://pinterest.com/pin/45106433740208091

Off the pick up supplies and of course I will be telling how the weekend goes,

See you soon,

SS x

Tuesday, 3 September 2013

Blackberry Shorties

    With this season's blackberries growing big and juicy.
 I created these moreish shortbreads. Great to make with little ones. The fun bit is folding the blackberries in the middle and giving them a good squish!

We have been blackberry picking more times this Autumn than any previous Autumn and it's only the 3rd September. I have a lot of blackberries in the house and making jam seems like a lot of work. 

   This recipe is great for kids as they are not too sweet, they can also be frozen or stored for up to a week in an air tight tin.

Let's Create!

You will need -

85 grams unsalted butter
2cm vanilla pod
1 large egg
200 grams self raising flour
1/2 teaspoon of baking powder
100 grams caster sugar
200 grams blackberries

Makes 20 shorties.

Turn the oven onto 180C or similar and let's begin!

Method -

1. Cream the butter and sugar together until light and fluffy.

2. Beat in the egg.

3. Cut open the vanilla pod and with a sharp knife scrap out the seeds. Add the butter mixture.

4. Sift the flour and self raising flour together and fold into the mixture.

5. Now this is the fun part, flour your surface and roll out the mixture until about 2cm thick. Spread the fruit on half of the dough and then fold the other half it. Roll with the rolling pin to squash the fruit into the dough. 

6. Cut out your shorties with a small cutter to be about 3cm high. They will rise.

7. Cover two baking sheets with baking parchment and add 10 to each tray.

8. Bake for 15 minutes or until golden brown.

Leave to cool as the fruit can be hot, hot,hot! Dust with icing sugar and enjoy.

Love to hear any other Autumn recipes for blackberries as I want to write more about these lovely seasonal fruits...before my little one eats them all.

Happy picking,


Wednesday, 17 July 2013

Our French Supper

How we celebrated 14th July...


After Le Tour had finished on Sunday evening, we had a our French inspired supper. It was a good excuse to cook for food for the three generations of our family and bring us together.

I cooked a brie and onion tarte with potatoes, apricot and almond pastries and almond sponges with fruit from the garden and fromage frais.

I worked for a French business before having Little L and used to love the amazing desserts we had in Paris; little tartes and pastries that looked too good to eat. What I love about the French lifestyle is that women can have a dessert and not feel guilt. More on this later. A meal of three courses and coffee is OK and you can enjoy your food. They must be doing something right as they are a leaner nation than us.

I cooked the tarte and pastries in the morning so not to be in the kitchen in the heat of the day. Here recipe for the tarte tonight, desserts coming later.

Recreate for yourself...

Brie and Onion Tarte

Making the pastry the night before and chilling it, makes it shorter and easier to roll. Try it and let me
know if it works for you.

You Will Need -
For the pastry..
200 grams self raising flour
100 grams butter
Cold water to bind
Pinch of salt

For the filling -
100 grams brie
2 red onions
2 white onions
250ml milk
3 eggs
Herbs of Provence

10in tarte dish. This one is Le Cruset (www.lecreuset.co.uk)

Let's Create!

To make the pastry...
Rub together the butter, salt and flour until it resembles breadcrumbs.
Add the cold water slowly to bind the ingredients to make a dough.
Wrap in clingfilm and pop it in the 'fridge over night.

Turn the oven to 180C or similar.
Roll out the pastry, grease the tarte dish and lay the pastry in the dish.
Bake blind (no baking beads) for 10 minutes until golden brown.
Remove it from the oven.

To make the filling...
Saute the onions until soft, add the herbs. A gorgeous smell!
Beat together the milk and eggs until bubbly. Slice up the bric cheese. Then layer the onions, cheese and egg mixture in the tarte case.

Bake for 30 minutes or until golden brown.

Serve with new minted potatoes and lots of crispy salad.

Lovely!

Why French Women Don't Get Fat?

As I mentioned earlier, it is a pleasure to eat and enjoy my food in France, dessert and all. You always need an excuse over in the UK to have dessert and why should you? If you eat sensibly and love your food in moderation then it's healthy.

I love the book 'French Women Don't Get fat - the secret of eating for pleasure' by Mireille Guiliano. Check out the website http://frenchwomendontgetfat.com/ . I tried it about eight years ago and it changed the way I eat forever.

Once you have cleansed your palette you then can enjoy food flavours and all. It has kept my weight down and even now I think a little bit of dark chocolate not the whole milk chocolate bar! Dark chocolate is better for you. It is great that my husband has the same philosophy about food.

So I do enjoy my French slow cooking, my champagne now and again and using my pretty French dining ware we picked up on honeymoon to create great food.

I will always remember by French colleague taking bread from the café back to the office to enjoy because it is 'beautiful bread', would we do this in UK? I think not.

So, I hope I have inspired you to take a leaf out of the French culture with my post.

SS x

Sunday, 14 July 2013

Bonjour Le Tour & All Things French

14th July, Cycling & France

I love France and all things French, I know as a Brit I should hate anything over the channel but I don't. I worked for a French company until last year and I use to love my work visits for the culture, the food and the French way of life all packed into my short visits! I have recently been on a course to brush up on my language skills to make my holidays more enjoyable in France.

My language packs and some lovely pictures from trips to France

We took our honeymoon in France after Mr S asked me to marry him in France 18 months previous. So there is no question that our love for France is part of our relationship and we hope to keep discovering more with our new little family.
Our honeymoon

Today is a big day in France and to celebrate Le Tour 2013 is riding one of the most spectacular rides of the three weeks - Mont Ventoux . I have happy memories of the area as my boyfriend asked me to marry him two days before we arrived in Carpentras near Mont Ventoux. I said yes and never looked back.

Around Mt Ventoux

So to celebrate all things French here are some of my favourite French things in my life, I think that I may have to spread these out over a few posts.

In My Bathroom

It has to be L'Occitane En Provence for the quality and products that really do work. I don't normally write about beauty but for this post,this is a one off.

I love visiting the stores and the smell really takes you back to those times in France. My husband swears by the shaving gel and I love the shea butter hand cream for crafty hands. 

I love Fragonard scents too,  I had to visit the museum on our honeymoon in Grasse and see first hand how these beautiful scents are created. They are now available in the UK through M&S, which is great news for getting a little bit of the south of France on your doorstep and in your bathroom cabinet!
My bathroom French products
 
Over the coming days I'll post some of more favourite French things for cooking, baby and not to forget crafting.
 
SSx


Monday, 1 July 2013

A Week Off


I haven't blogged for over a week, due illness, DIY, starting my crafty business (*coming soon*) and just any spare time spending it with the family. It seems that we don't get that much time together, so on sunny days it is great to get outdoors and enjoy those precious moments. But since midweek, the bug got the better of me and by Friday I was no use to anyone.

Thankfully, I am on the mend and wanted to share with you our favourite family craft from the last seven days...

Cooking...
It is enough cooking with a little one, so I am including her in what we do. We fold clothes, peg out washing and now cook. Sometimes it is hard and messy but always fun and she loves it (she doesn't cry, so I take it she loves it!)

 
We make shortbread which is great fun, quick and easy. Mixing the ingredients together, watching me and then playing with the dough! I gave Little L some food colouring to try and make some patterns with and some currents to add, cover, coat - whatever!

The mixing and colour changes really kept her concentration. The rolling pin was substituted for a tin foil inner but she copied me and we made biscuits.

I hope this is just the start of our cookery adventure together and we can eat home cooked food too.

I really want to show her where our food comes from, how we grow it, mix it, bake it and then eat.


I have just been in the garden and the raspberries are ready to be picked so any recipes for these would be greatly received..

SS x


Sunday, 16 June 2013

Almond Shortbreads

Perfect for afternoon tea


Almond shortbreads with raspberries and ice-cream
 
To celebrate Father's Day, I baked (with some help with Little L) some light, fluffy almond shortbreads. Mr S loves almond biscuits, the type you get with your coffee at the coffee shop. It was the perfect excuse to put the oven on and bake.
 
They take only 20 minutes from start to finish and can be eaten warm out of the oven or can be stored in an air tight container for a few days. Lovely.
 
Let's Create!
 
Makes approx. 20 biscuits
 
You Will Need -
 
100 grams caster sugar
1 large egg
190 grams pasta 00 flour
10 grams ground almond
1 teaspoon almond essence
Half teaspoon baking powder
pinch of salt
90 grams unsalted butter
 
Before you get started, heat the oven to 180C or equivalent, line two swiss roll trays with baking paper.
 
1. Beat together the sugar and butter until fluffy.
2. Add the egg and beat into the mixture. Add the almond essence and stir.
3. Mix the flour, baking powder and ground almonds together in a bowl.
4. Sift in the dry ingredients and fold in.
5. Mix to form a loose dough and turn out onto a floured board.
6. Roll out until 2cm thick. Cut out with your choice of cutter.
7. Place on baking paper lined swiss roll trays with a few centimetres gap. They will rise.
8. Bake for 10 minutes until they are golden.
9. Place on a wire rack to cool.
 
Enjoy with raspberries, ice-cream and a sprinkle of good quality cocoa.
 
Lovely,
 
SS x


Fathers Day Cards 2012

Making & Crafting For Grampy...


I love this card that I made with Little L for Grandad aka Grampy. It is really rewarding to take time out to create something so unique and sentimental. We stuck on stickers, she scribbled on most of he card and we posted it off to Grampy for his Fathers Day.

We got the call to say thank-you, very touched so I thought I would share our artwork with you. Sometimes something small can mean so much.

Well done Little L,

xx
 

Monday, 10 June 2013

#MondayMoods Italian Foodie!

My Growing Italian Cupboard...


Starting to get a bit of a collection in my kitchen of these fab bottles and tins from my travels in Italy. They seem to tell a story of where they have come from, who made them and a bit about the area. I feel enriched by the pictures and stories on the labels as I cook...imagining I am in that little hillside town on a Summer's day...just for a while when dinner is cooking..

Will keep building on my quirky collection as it's just so inspirational on my kitchen shelf.

SS x


Monday, 6 May 2013

My Top 5

My Top 5 Week 1

#sbtbmytop5

I was inspired by MummaFox at www.poppyfoxathome.com to look at a 'My Top 5' for the week and see if I could set a goal of five things and stick to it for a week. Things for me.

Motherhood is beautiful, but also busy, tiring and time hungry at the same time. I wouldn't change it, just be a better juggler! Some days I think I have a few hours in the evening and Little L can't sleep or the washing needs to be done and there is my free time gone. I am not the only one, so the 'My Top 5' sounded a great project to get involved in.

So here is My Top 5 for the week....

1. Time in the garden
2. Next step to my online shop
3. Cook something I have never done before
4. Share my craftiness
5. And breathe!

So here is how I got on...


I worked out that for me to take time the garden even just to weed or tidy up, I needed to make sure Little L love it too. So we watered and grew some garden cress which by the end of the week seemed to be even more interesting!! Good start! 

Sometimes she wants to just throw gravel onto the seeds or play in the water but the whole experience is part of family life. Something we are adapting our lives to,so we don't stop doing things we love. Plus the garden is a little bit more presentable.

I am also in the process of making some beautiful vintage fabric accessories for my new online shop (more info www.samanthaschofield.co.uk). This week I set myself a target of making my vintage fabric purses for the shop.

Here is just a sneaky peek at my colour palette, my old fashioned sewing techniques (no glue here!) of making the purses.

I am really excited to be sharing these online very, very soon.

Watch this space.
 
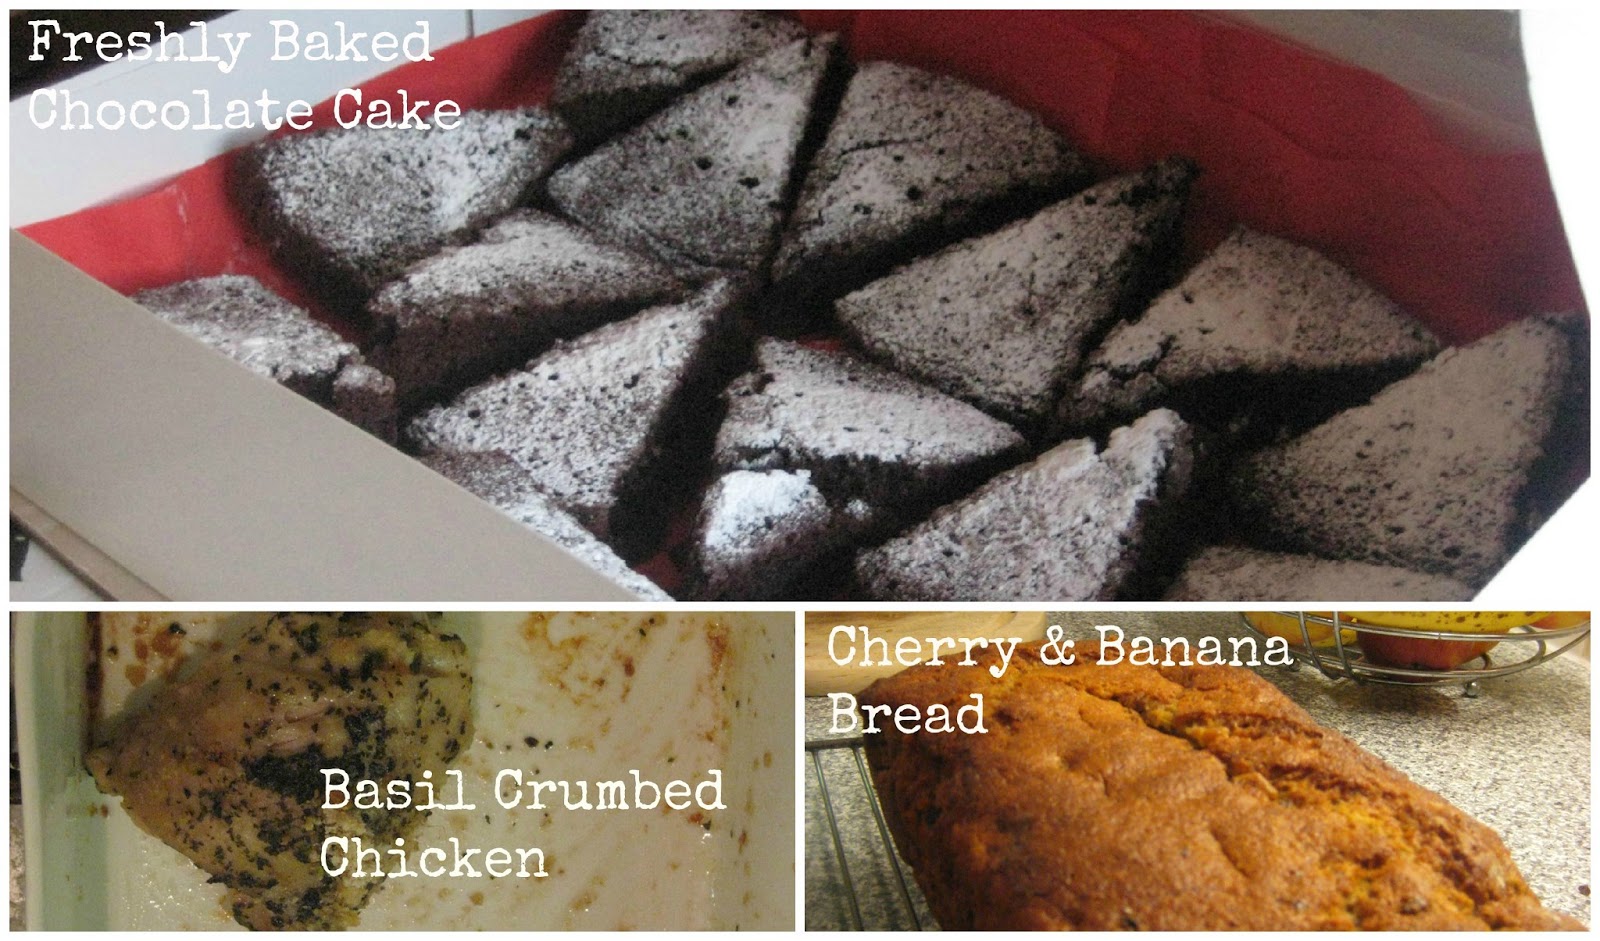
I decided that to share my craftiness, and take a freshly baked cake to a party on Friday. I never take my cakes out as a rule, as I don't want to look a show off if you know what I mean? I don't want to say that I can be 'super woman' and even bake cakes, run a home, bring a little girl up, set up businesses, be a landlord... I am sure other busy Mum's get my drift. But after looking at the sad cakes in the shop, I went home and baked one in an hour and it went down very well. Sharing my craftiness. I even put it on my blog I was so proud! Well done Mummy.


I also wanted to cook something I had never done before, my husband is not vegetarian and even though he is very good and mostly eats veggie food I decided to roast some chicken for him instead of buying pre-packaged pieces that aren't great. This was a basil and breadcrumb coated chicken thighs recipe I made up. He enjoyed it too.

I also managed a family bread recipe also on the same night, using bananas and cherries whilst cooking the family dinner. I felt such an achievement! My list was nearly complete!

..and breathe!

With our lives with a Little L, I don't have time in the week (at the moment) for pilates or yoga classes, but it is on the list. So each night when she goes to sleep I take time out for myself. I visualise and breathe and then I am ready for a relaxing evening and am getting a great sleep as a result.

Try it yourself... Click here 

So that is week 1, the gardening, purse making and breathing really made a difference.

Go on try it yourself..Click on www.poppyfoxathome.com or follow on twitter #sbtbmytop5

Enjoy your Top 5

Sam x

#Mondaymoods May Day Blue


There is something so calming about blue and at the moment I have a sea of blue in the garden. The forget-me-nots, mascari and hyacinths are in full bloom adding a sense of tranquillity on a sunny and warm day May Day.


Friday, 3 May 2013

Party Chocolate & Vanilla Cake

Handmade Cakes just like they are fresh from the bakers...


I decided to bake some cakes to take over for a Girl's Night In as I saw what was in the store all wrapped in plastic and well...fresh cakes - is there anything better?

So with one hour before going out and an 18 month old requiring tea, I put together this cake and yes it is possible and no you don't have to be Wonder Women - here is how...

You Will Need -

2 very fresh eggs
110 grams self raising flour
1 teaspoon baking powder
Half teaspoon of good quality vanilla essence
125 grams sugar
125 grams butter
25 grams cocoa powder
1 tablespoon whole milk

2 x 8 inch circular sponge trays greased

Let's Create!
Heat the oven to 170C

1. Cream together your butter and sugar until light.
2. Beat in the eggs one at a time.
3. Add the milk
4. Add the vanilla essence
5. Sieve the flour, baking powder and cocoa together and fold (must fold!) into the mixture.

Add to the trays in equal portions and bake for 20 minutes.

Cool and turn, sieve icing sugar over the top and carry to your party in cake boxes (available from Ebay)

Happy Baking ( those fresh cakes),

Sam x
 

Tuesday, 23 April 2013

Preview of what is to come...

I want to a say a big thank-you to everyone who has taken the time to read and comment on my blog. It means a lot.

So here is a sneak peak of what I have got planned for the months ahead.


Themes

May
Weddings
Purse Making
Dressmaking / Vintage Patterns
Hat Making


June
Baby
Chocolate
Upholstery
Crochet
Garden Parties

July
Fruit
Children's Crafts
Smocking
Upcycling

August
Summer
Florist Crafts
Birthdays
Quilting

September
Harvest Time Crafts
Lace


October
Halloween
Soaps / Bath Bombes
Spring Garden Planning


November
Christmas Crafts
Knitting
Gift Wrapping


If you are interested in posting or have a product that needs a crafty review, drop me an email samanthaschofield@gmail.com. I am PR friendly!

Happy Crafting

Sam x

Saturday, 6 April 2013

Rum,Chocolate & Raisin Slice


I love rum and raisin ice cream, it reminds me of warm sunny days and the seaside. So with this thought, I created a chocolate rich cake. Make it thin in a 8" tin, it will make two tins worth. Store it up to 1 week in an airtight tin. Serves (both tins ) 10.  Great slightly warmed with ice cream.

Let's Create!

2 eggs
100 grams self raising flour
25 grams good quality cocoa
100 grams unsalted butter
1 tablespoon milk
1 cup raisins
1 teaspoon rum essence
Icing sugar to finish

Preheat the oven to 180C or equivalent.

1. Cream together the butter and sugar to the mixture forms soft pale cream peaks.
2. Add the essence and each egg one by one and beat well.
3. Sift in the flour and cocoa, then fold in.
4. Add the raisins and fold again.
5. Grease both 8" tins and add in the mixture.

Bake for 20 minutes or until the cake is springy to the touch.

Leave to cool before turning out on wire racks.

I really love this recipe with a good quality coffee. A real treat.

If you liked this recipe then search my blog for more recipes and baking posts under the title header.

Happy Baking!

Sam x

Tuesday, 26 March 2013

Fruit At The Bottom? Secret to unsunken fruity cakes.

Tip For All Over Fruity Fruit Cakes!


Don't you just hate it when all your fruit sinks to the bottom of your lovingly made cake? I passed this tip over this week to a friend and it worked for them too..
 
All you need to do is to coat your fruit after soaking or washing. Wash it and when wet, roll in a tea towel and let air dry for an hour. Then take some flour and roll your fruit in the flour to create a barrier between cake and fruit. Follow the recipe as normal to add your fruit.
 
Try it and let your cake be all over fruity like ours!
 
What are you baking tips, love to here? What works for you?
 
Happy baking!

My Italian Almond & Chocolate Cakes

Perfect with a strong coffee and light enough to have more than one..!


I have not have much time to blog in the last week due to work, illness and a teething daughter. But tonight, I thought, it's time to go in the kitchen and create a new recipe.


It's been a while, so with a need for a good strong coffee I bring you my Italian inspired almond and chocolate cakes. And they really are perfect with a good proper coffee made with beans and hot milk. The cakes use rice flour to give a bit of bite which is unexpected but makes the texture not as light and fluffy as a fairy cake.
So, if you like me only have the kitchen for 30 minutes, cook up some delights and put your feet up!
To make 12 cakes you will need -
125 grams unsalted butter
125 grams sugar
2 free range medium sized eggs (mine weighted 125 grams for those who read my post on weighing your eggs!)
75 grams self raising flour
50 grams rice flour
1 teaspoon baking powder
1/2 teaspoon almond essence
2 tablespoons good quality cocoa
1 tablespoon milk
12 cake cases and a cake baking tray

Let's Create!

1. Set the oven to 180C or similar check your manual.
2. Cream the butter and sugar together until light and fluffy.
3. Beat in the eggs one by one.
4. Add the almond essence.
5. Sift the baking powder and flour into the mixture then fold in the rice flour too.Fold in big movements to give lots of air to the mixture.
6. Fold in the cocoa and stir in the milk.
7. Add a heaped tablespoon to each cake case.
8. Bake until soft and bouncy on the top and a knife is clean when tested on the cake.
9. Cool on a wire rack before serving.

Saturday, 16 March 2013

Little Fairy Cakes - My Foolproof Recipe

My Little Fairy Cake Secret ....

Mmm fresh and from the oven...

I just love to make little fairy cakes, but sometimes when you are busy they are not as easy to do. The edges go biscuit like and the sometimes they are too dry or too greasy. A local farmers wife told me this trick and it works every time for me.

Weigh out your eggs first. The eggs all weigh different especially if they are free range. Then whatever the weight of the eggs, add equal amounts of butter too cream with the equal amounts of sugar. Beat the eggs and fold in equal amounts of self raising flour. Add a dash of cream and vanilla essence at the end. Pop into cakes and bake at 175C or similar for 20 mins.

A secret worth sharing.

Can you share any tips? Happy baking ..


Thursday, 3 January 2013

More Bath Bombes 2013 Style

After Such A Big Response To Bath Bombes ...


Here is a new recipe...Earl Grey & Lavender Bath Bombes

 makes 12 bombes


You Will Need -

115 grams bicarbonate of soda
100 grams citric acid granules
50 grams cornflower
2 teaspoons lavender essential oil
1 teaspoon lavender dried flowers
2 earl grey tea bags
1 teaspoon of sweet almond oil
1 egg box
12 small freezer bags
1 tablespoon cornflower for final step
Almond oil to grease out the moulds


Go Create!

1. Mix the bicarbonate of soda, citric acid granules and cornflower in a bowl.
2. Add the tea leaves from one tea bag and dried flowers to the mix
3. Then add the essential oil and almond oil drop by drop so that the mixture comes together like wet sand. If you think it needs more oil mould it in your hands, if it sticks then this is the right consistency.
4. Then take a tablespoon of the mixture and mould in your hands like a snow ball.
5. Place the ball in a food bag and mould really tight into a ball through the plastic.
6. Wrap tightly in the foil and leave for 24 hours.
7. After 24 hours roll in the a mixture of earl grey tea leaves and 1 tablespoon of cornflower.

Once dry wrap in brown paper or acetate and they are ready to use!

I really hope you enjoy making these bombes as much as I did. Please send me your ideas and I try and make a new recipe.

blogger template