twitter facebook instagram bloglovin tumblr google plus pinterest youtube
Showing posts with label Wedding. Show all posts

Friday, 8 July 2016

Craft The Wedding You Want..Going Back To Our Wedding Venue Six Years On...


..because beautiful, unique venues do exist. 


We created our perfect Wedding day

Today, I'm writing about our Wedding day and how I visited our Wedding venue, Masa At The Old Chapel, Derby to revisit one of the happiest days of our lives. I want to show that you can be a DIY bride and your Wedding venue will be happy to help as little or as much as you want.  
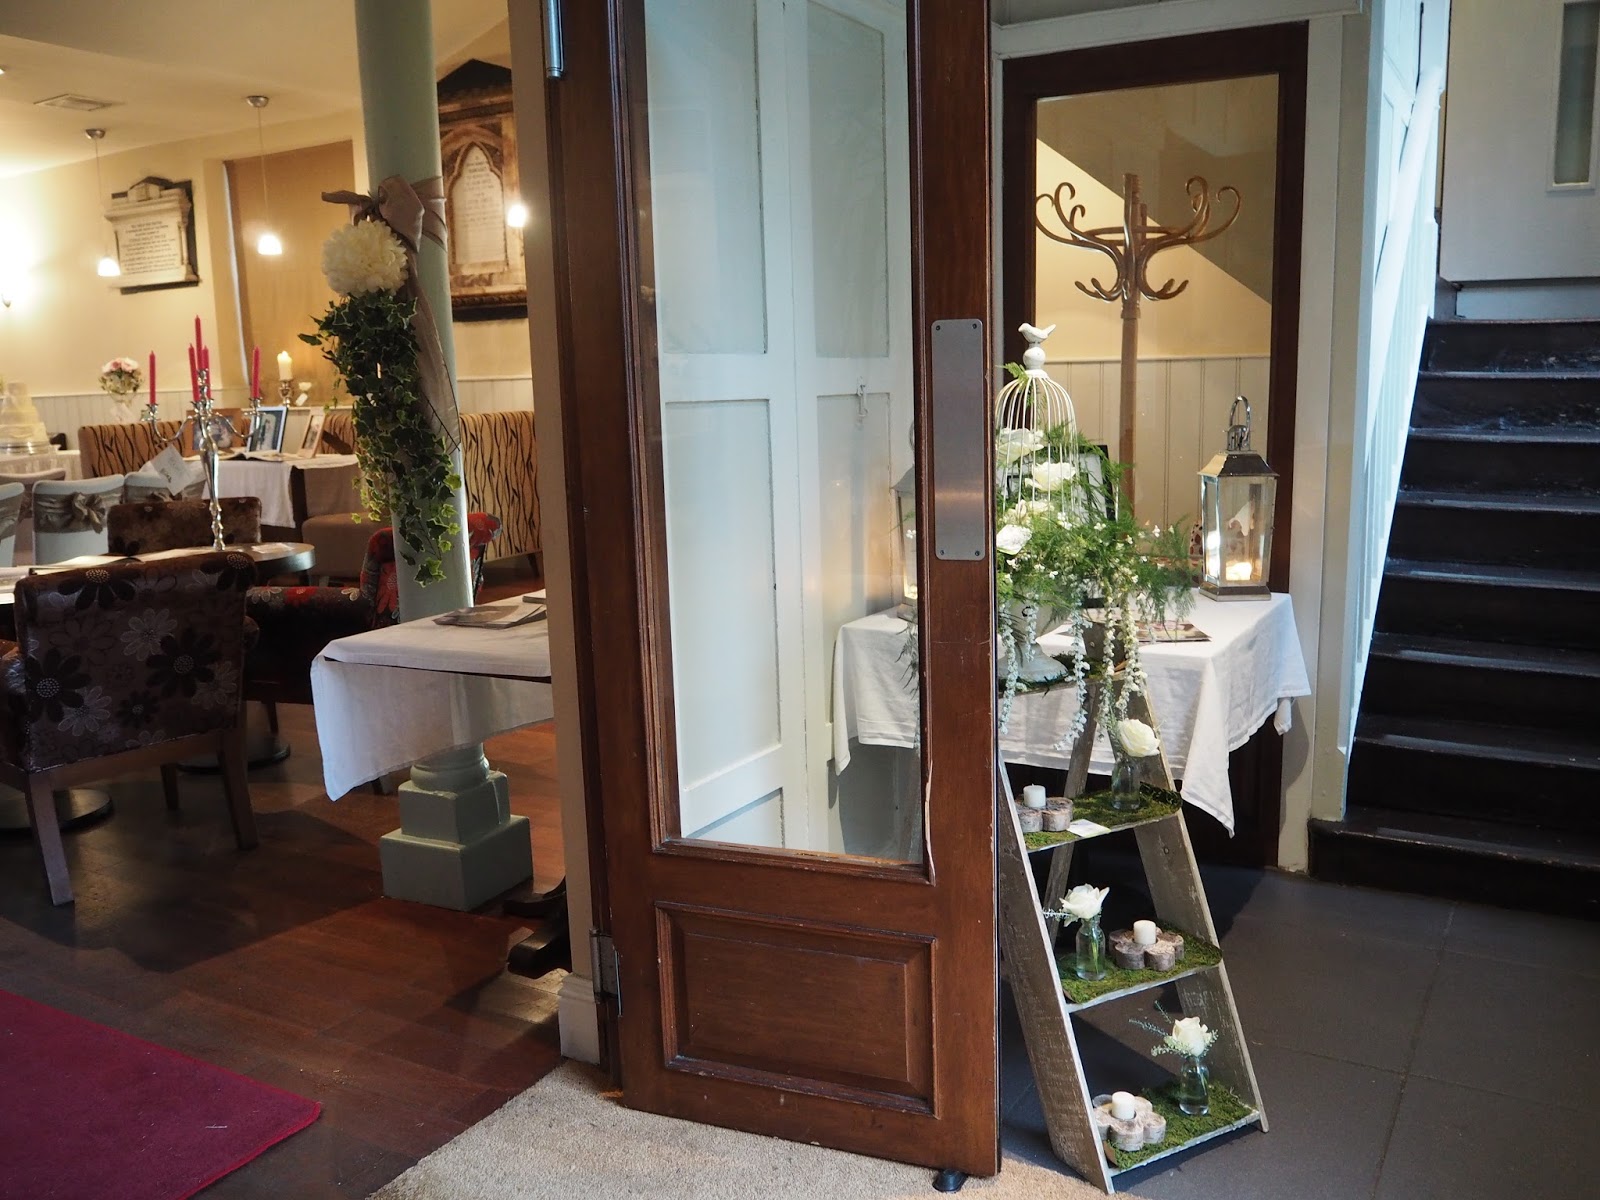
When we walked through the doors of The Old Chapel back in 2009, we felt that we had found the place to hold our Wedding reception. That was it, after six months of looking. It was unique and different from the other Weddings venues we'd seen and this one let you do it your way. 


It was a total breath of fresh air for a bride-to-be with visions of a creative DIY Wedding. I was amazed when we saw the packages that we could just book the venue to host the Wedding breakfast, we could style it ourselves and create what we wanted.

Masa At The Old Chapel is very light and airy, with space for up to 80 guests in the old gallery on the first floor with a reception area/dance floor and bar area downstairs. The venue is licensed for ceremonies too but we wanted to host our party here and bused in our guests on 1960s buses to add to the old fashioned feel.


We went for a colour scheme of duck egg blue, gold and cream and used pretty voiles to wrap around the posts in the reception/dance floor area. Our amazing photographer took this fish bowl lense photo just before our guest arrived!


We filled the windows with vintage glass jars and bottles filled with fresh flowers and the venue were happy to let us in the morning to style as we wanted. I had about six friends helping me put decorations on the tables, wind fabric around posts and fill the windows with prettiness.


Fast forward six years and here I am again and this time it's for their Wedding Fair. The lovely team showed me that again you can do as little or as much as you want for your celebration. Here is my tour and the inspiration I took away from the day (and the memories!) Maybe we can throw a big party here for our tenth anniversary?

The beautiful pillars wrapped in silk fabrics

Pretty little details by Dylandco

Hydrangea Blooms at the front door from River Bank Floristry

Cream roses giving a rustic feel on the front ceremony table

And ivy draped over the linens.

I loved this huge bouquet bloom. I used mine to double up as centre pieces and bouquets.

The large windows are just waiting to be dressed!

The view from the top table.

The guests dinner view.

Cute lit up letters from Spirit High.

Cosy styling from Dylandco again.


My tips for DIY Brides -
Do expect to be at the venue on the morning of your big day
Ask your friends to help on the day
Get some high quality hand cream, you will be using your hands a lot
Don't go to too many Wedding fairs, know your own mind and style
Set up a Pinterest board and show to all your suppliers
Be prepared to have boxes of props to sort out after your honeymoon!

Thank-you to Masa At The Old Chapel for having back to babble on about how much I loved our Wedding day!

I'll be back to sample the Taste Of Masa Night in the near future.

Love,

Samantha
xxx

All views my own. Our Wedding photos courtesy of www.ezekieltaylor.co.uk

Saturday, 22 March 2014

Four Years On From Our Vintage Wedding...and some tips for Brides-to-be!


I love looking at old photo's of our Wedding day! On Thursday our Wedding Anniversary, we got out the pictures to have a look at, for well.., old times sake! 

After four years, the overall excitement and enjoyment of the day hasn't faded. We both loved it so much, it went too fast and was a total mix of emotions which we were both were not expecting. Family, friends old and new being so kind and caring to the both of us.

We planned the Wedding in just six months for a party of 120. It is possible, it was a lot of hard work, late nights and weekends. To be honest we had no time for re-thinking anything, but just went with everything we agreed on. As a happy crafter, I have written on the blog before about the dress I made, the flowers I put together and planning your stationery.

Sadly Pinterest was not yet widely available in 2010, but after I discovered Martha Stewart Weddings on a business trip to L.A. everything fell into place. Martha was a life saver!

I would never put anyone off doing a DIY Wedding, it is fun but you need family and friends to help craft with you. It is fun, bespoke and personal for your Wedding.

My top tips are -
  • Share your ideas with your suppliers as soon as you can.
  • Pick a simple colour scheme of four colours.
  • Have a critical planner with key dates on and plan,plan, plan!
  • Listen to other people's ideas they might be a good one
  • Visit one or two Wedding fairs only and go with what you love not what is in fashion.
  • Think of the details, such as special presents for people who helped you prepare the day.
  • Enjoy planning and preparing and go with your gut instinct!
I would love to hear your DIY Wedding stories too? 

BBFN,

Monday, 9 December 2013

Fizzy Bunting Guest Blogger - it's me!

Well hello Monday!

This morning was a dark December morning here in Derbyshire. Then the sun broke through the clouds and Fig Tree Road posted my happy DIY Christmas wreath tutorial!

Hooray for Mondays. Thank-you to Charlotte for inviting me to guest blog for her. 

 Christmas make using ribbons and bows


DIY Christmas wreath tutorial! If you love DIY Christmas projects have a go at this eco-friendly wreath.

I love Charlotte's online gift shop, full of lovely eco-friendy loveliness. Check out her Mr and Mrs Ring Dish, a perfect little Wedding gift.

I've got some more wreath ideas coming up, so I'm off to rummage in the ribbons and bow stash again. 


Bye for now,


Saturday, 19 October 2013

Pretty Layered Papers

Using Punches, Old Books And Pretty Papers...


Create textures for your card-making projects


With some old books to give a vintage feel and pretty papers, I set about making textured Wedding cards inspired by the book 'The Secret Garden'. This is a lovely technique to make, it's very easy and I wanted to share this pretty effect.

Using layers of velum papers painted with inks and acrylic paints, I firstly made up a large sheet of pretty punched paper and then tore through this to add a layered on layer effect. Being as creative as you want to be see how the colours and textures grow and run to give an organic effect. I just love it as it is unique.


The end card using the layers of papers
To finish off, I took some metal sheet, similar to gold leaf (but much cheaper!) and brush this on and sealed with glue.

close up of the punch papers

What I have is a card which looks like you are peering through to a secret punched paper garden of prettiness. You can even add some little keys to finishes it off, 'keys to my heart' with little tags with your spouse to be's name on.

Lets me know if you have any similar ideas to this one as I am always keen to learn new ideas!

Bye, bye for now,


Sunday, 29 September 2013

This afternoon I washed my Wedding dress..

Washing Silk isn't scary!!

This afternoon, after three years I decided to take the plunge and wash my handmade silk Wedding dress. After getting crazy quotes to have it professionally dry cleaned (as it was handmade and didn't have a care label) ,I got out my old text books from my textile classes and washed it my dress.

I have to say that it took Mum and I hours to make and embroider but it was a risk we pulled off and this is how I did it.

  • First of all I filled the bath in warm water and added hand wash detergent.

  • I laid the dress in the water and left it for ten minutes.

  • Then I carefully rubbed the dirt and left it again for a few minutes.

  • After a few more rubs I emptied the dirty water and filled up the bath again with cold water.

  • After a rinse I took my very heavy Wedding dress and rolled it in a beach towel and ran downstairs to put it on the washing line.

  • On the line, I resized it by stretching the silk so it retained the original shape. Silk is tough so it took the shape perfectly.

The dress was on the line for three hours and then finished off drying on the curtain rail in my bedroom before a press.

As my Mum says it's Indian silk, so it's a tough fabric. And I saved over £100 on dry cleaning. It worked for me!


Sunday, 25 August 2013

Book Review - The Art of the Special Occasion

For any event from a Garden Party to a Wedding ...
This book has the answers...
I first saw  this book in magazines around the time I was planning our Wedding (2009/10.

I had seen Lucia Van Der Post's previous book 'Things I Wished My Mother Had Told Me', when I was a graduate living in London years before our wedding was on the cards. The subtitle attracted me 'Lessons in Grace and Elegance'. 

I love old fashioned polite manners and when the 'Celebrate' book came out I had to buy it for our Wedding planning. And now I use this book all of the time.

Why do I like it so much? It's a really easy book to read, pick up when you are super busy and take snippets out of. The etiquette parts are great too, so you know for a special event that you don't screw up.
I used it to save a small fortune on our Wedding, taking ideas out of the book to make our day unique and special. I have gone on to use it for Christenings, Christmas, Picnics and Garden Parties.
This weekend we are having family over and again the book is out for ideas. Here are a few pictures of the best bits...

The reference pages make it easy to look up exactly what you want to read and quickly.
If you are flicking through, the sections are really clear to find.

The key points of the chapter are bullet points in this gorgeous border with references to the page for more details.


The books goes into lovely detail like for picnics, the type of rugs to take. Details are so important at events and Lucia make the planning all that special.


If you have an event coming up I really recommend this book as it makes the planning simple, fun and oh so elegant! Tried and tested.

This is an independent book review, I have not been paid to write this.

Happy Planning,


Monday, 17 June 2013

My DIY Wedding


6 months to prepare for 1 lovely Wedding day!

 
My hints and tips on surviving your crafty Wedding -

1. Plan and go for it!
Whatever your crafty ideas are for your big day. Plan and prepare and then go with a gut reaction. Believe in yourself. If you want a theme or a look, research the easiest and quickest way to do it and then settle down to repeat it again and again. Better to have a simple, crafty idea then fail on something fancy.

2. What is your theme?
When you have your theme, plan it out on mood boards so you can show your suppliers / friends / photographer your ideas. Try using pinterest for a general mood board then break down some bigger ideas onto separate boards e.g. cake, flowers, dress. Don't go over the top, as they say... a picture can tell a thousand words.


3. Find your suppliers early...
Work out what you want to do to make your day bespoke and made by you. Then find out from your mood boards where you need to source the supplies from. You might want vintage china plates, but running around charity stores every Saturday may not be a good use of time. You might want to use a vintage crockery rental and spend more time designing your flowers or dress?


4. Get some help?
Even if you think you are the Queen of Craft, you will need help. I had one helper for each big thing e.g. cake, dress, flowers, venue staging. Friends will want to help, be ruthless and use those who will listen and support, not those who want to go off brief and do their own thing. It is your day, you can say no! Those that you have asked will be honoured and sure to support your dreams!

5. Get used to repeating your craft again and again.
As I mentioned earlier about starting out and keeping it simple - stick to it. When you are hand making the 100th dinner place setting you will be thankful.

6. Look further a field of inspiration..
I used Martha Stewart Weddings website and magazines a lot. Really practical and inspiring. I was in L.A. three months before our Wedding and brought a stash of wedding titles back. Look outside what is happening in your own country as they maybe a trend you love which is not on your local radar. Spend a night on the web and you might come across a theme or a look you can re-invent for you own Wedding.

7. Budget and use a spreadsheet!
I know it sounds geeky but note down all your planned budget on a planner and then update the costs as and when. Your crafty Wedding may not be a budget Wedding if you are crafting to save money. For our Wedding, I made my Wedding dress with a lot of help from Mum. It was our biggest money saver and the dress was worth every penny. I did spend more time than planned sewing on pearls to the bodice but the time and cost were justified. If you find your time and costs are spiralling look at doing something another way. You will hate it in the end and it will reflect on your big day.

8. Use a good hand cream
Sounds crazy but after months of crafting your hands will say you are a Wedding crafter on your big day without you saying anything. I got around this by sleeping in hand scrub and gloves the week before I go married!
I did my bouquet and table decorations on the morning of the Wedding and knew my hands would take a bashing so I wore gloves. I also went for a nude nail polish in case it chipped and kept my nails short. Try a shea butter or cocoa butter hand cream and apply regularly. Use a hand mask at night to hide your secret!


9. Get support
There are loads of Wedding blogs you can read for support and chats you can join online. I did feel like the only Crafting Wedding out there to start with but once I found fellow crafters online it made it so much easier. Remember it's not a competition, it is your day and do it your way.

10. Relax!
   I was amazed that a few days before our Wedding everything seems quiet, that was because it was all done except the last minute flowers, staging and hair. The dress and fascinator were ready, everything was ordered /paid for. This gave me a few days of the week of our Wedding to relax and enjoy being a Bride -to-be.


I hope that this is useful and the feeling you get from being a crafty bride is amazing.

Happy to answer any questions....

SS xx

Life in a Break Down

Saturday, 4 May 2013

I'm a Guest Blogger on Make.Do.Sew!

Get Ready For Stitching - Here Comes A Wedding Project..

This week my Cross Stitch Wedding Ring Pouch  project was featured on Make.Do.Sew.  Little quick projects are my big thing at the moment and to get my Wedding ring pouch featured in time for all those Summer Weddings is a real pleasure.


I love reading Lou's blog as it is full of up to the minute crafty projects that inspire you to get your apron on or dig out your sewing box.  Grab a cuppa and take a look, I am sure you will be inspired.

So why not use up your sewing and stitching stash and great a personalise gift for the Bride & Groom? Click here for the tutorial Cross Stitch Wedding Ring Pouch

Happy Stitching,

Sam x
 
blogger template